Step-by-Step Guide: Moving Articles Between Projects
![[object Object]](https://cdn.jsdelivr.net/emojione/assets/3.1/png/32/1f449.png) To move articles (in bulk) from one project to another, follow these steps:
To move articles (in bulk) from one project to another, follow these steps:
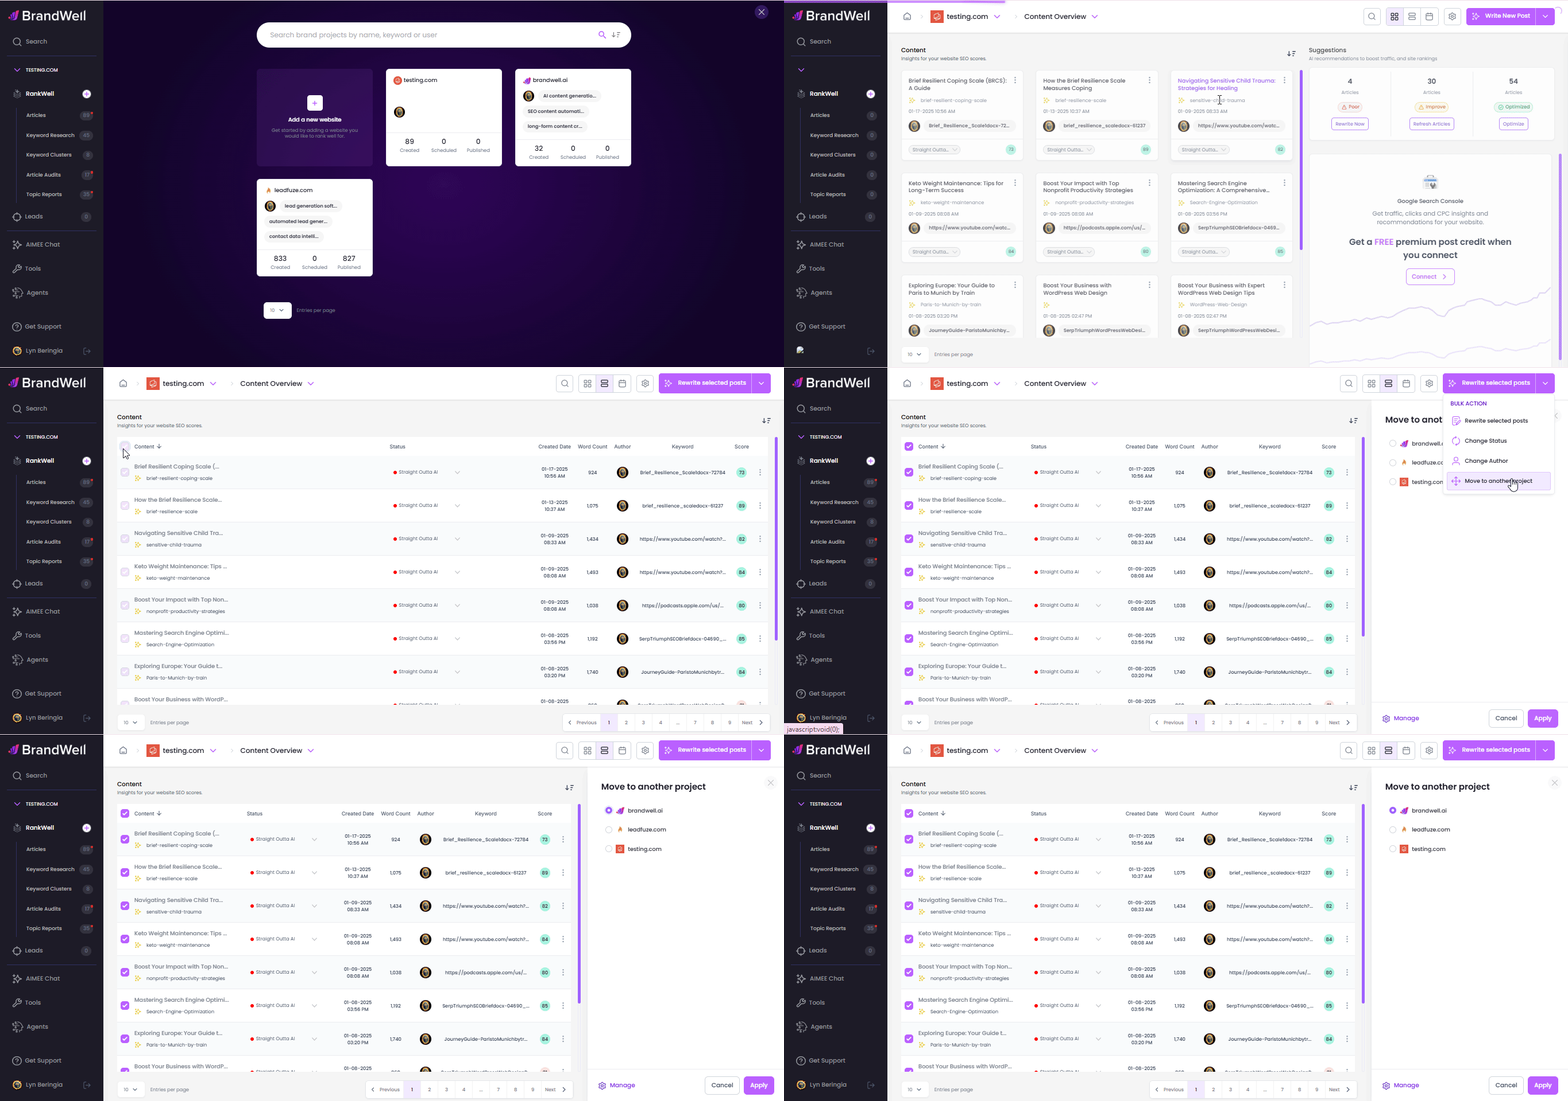
- Filter Articles by Status (Optional): If you want to move articles based on their post status, start by filtering them accordingly. Once filtered, switch to list view by clicking the two-bar icon.
- Select Articles: Choose the articles you want to move by selecting them individually, or select all to move them in bulk.
- Initiate the Move: In the top right corner, next to the "Write New Post" button, click the dropdown arrow and select "Move to Another Project."
- Choose the Destination Project: Select the project to which you want to move the articles and click "Apply."

![[object Object]](https://cdn.jsdelivr.net/emojione/assets/3.1/png/32/1f449.png) To move a single article:
To move a single article:
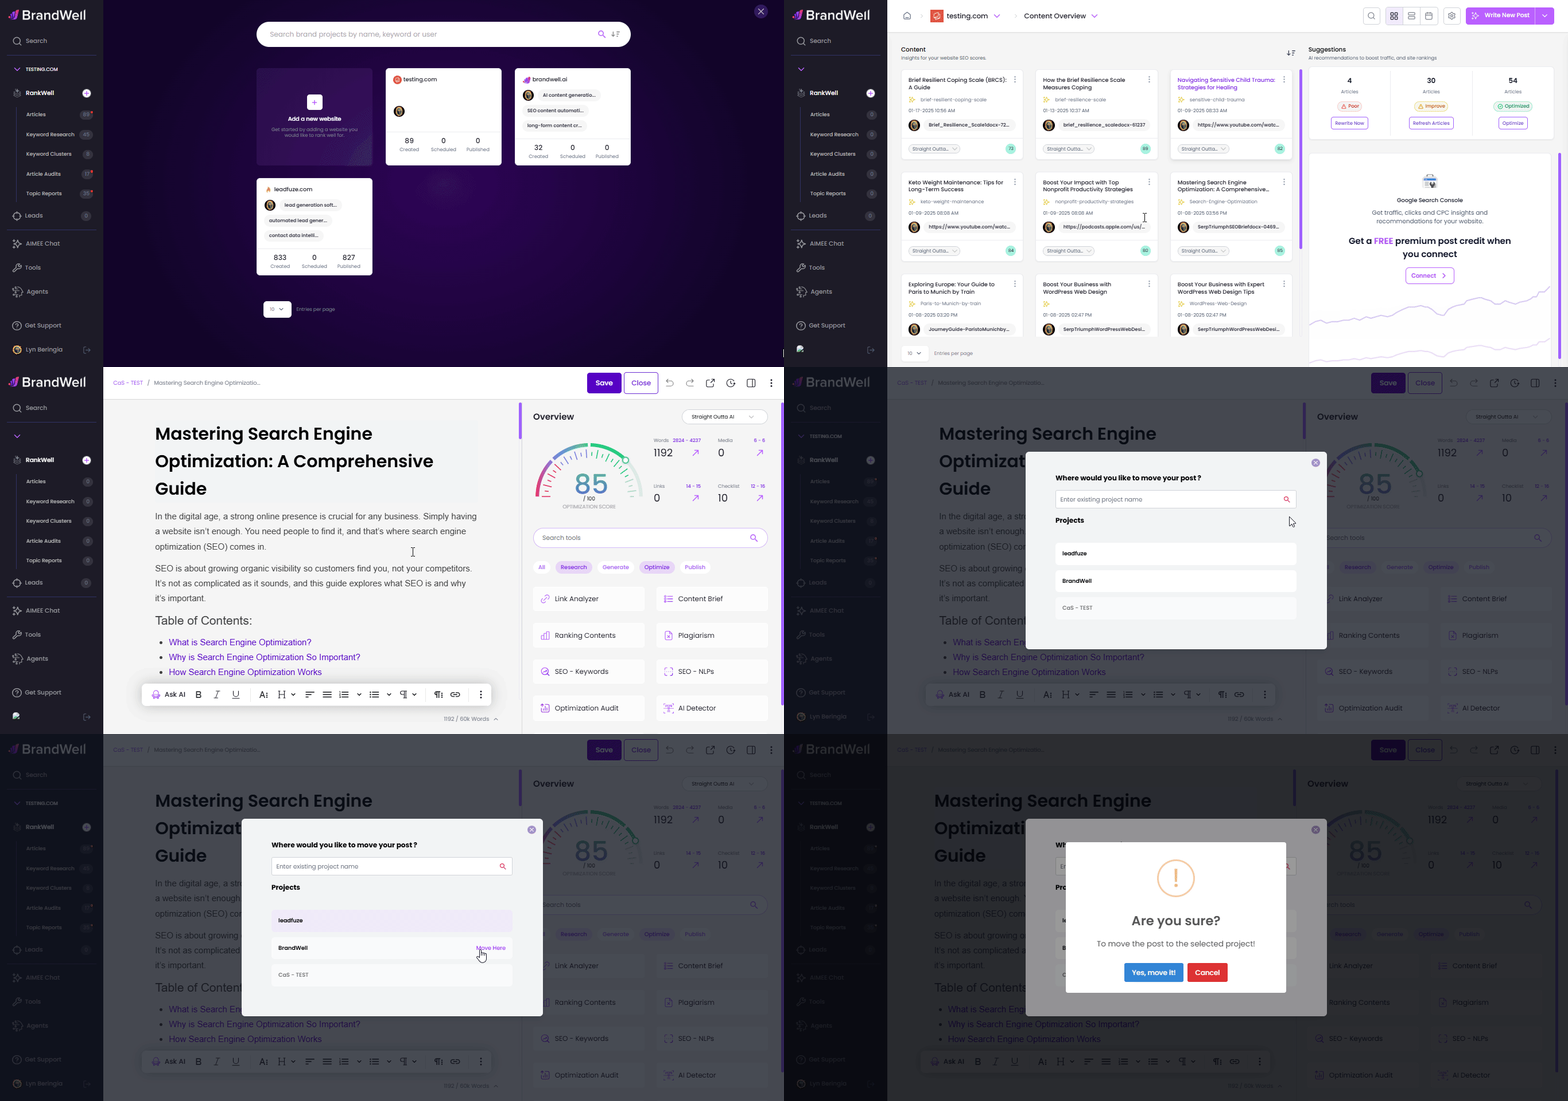
- Open the Article: Open the article you want to move.
- Access More Options: Click the three dots in the top right corner of the editor page.
- Move the Article: Select "Move File" from the list. In the pop-up box, choose the destination project and confirm your selection.


